Quick Start
This section will guide you through the most basic usage of CHITUBOX Dental to get you hands-on as fast as possible. We will start by loading a model, adding supports, slicing the model, and finally exporting the printable file to your printer.
Add a printer
When first launch CHITUBOX Dental, you might need to add the printer you need. Let's say we wanna add ELEGOO Jupiter. Click the add button on the machine management bar, or click the "Add Configuration" option in the Config menu, and select ELEGOO Jupiter from the list.
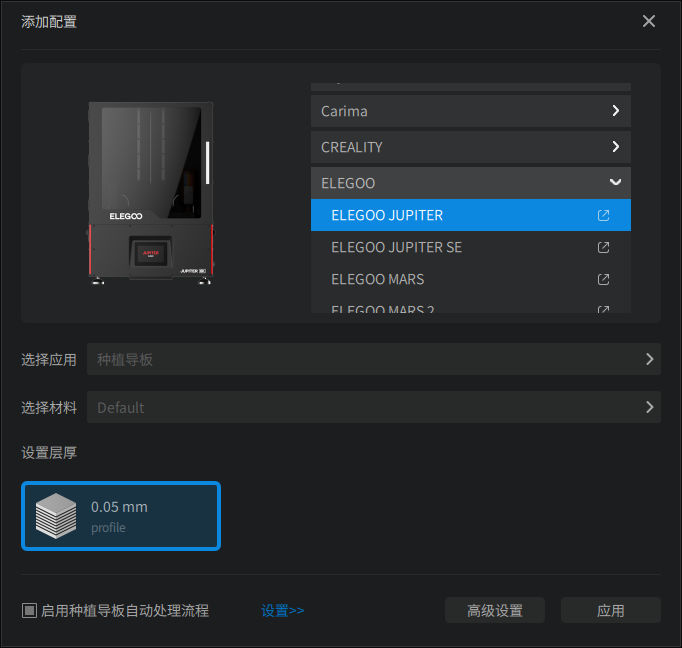
Choose your application, material, and layer thickness. If the selected application is one of the applications that are effective for the "Automatic Processing Flow", you can check the "Enable ··· Automatic Processing Flow" option to simplify the processing workflow.
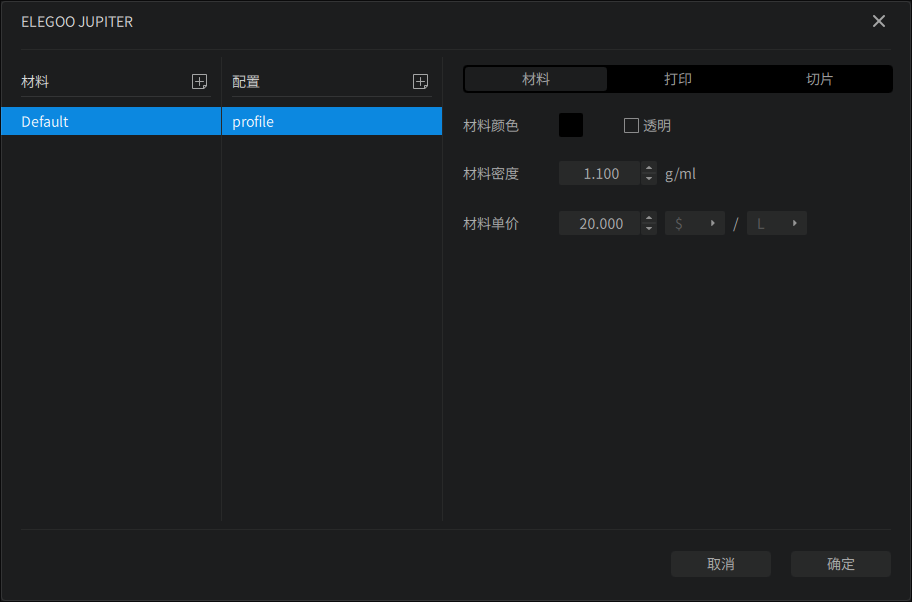
You can enter Advance Settings to further set the required configuration. For convenience, we will use the preset parameters. Click "Apply".
Load Files
You can easily load existing files into CHITUBOX Dental via the dialog window way or drag-and-drop way. Let's open a file via the dialog window way.
Click the File option in the upper left corner of the main window. If you want to load an existing project, click "Open Project". If you want to open a 3D model file, click "Import Model". You can click 🔗this link to check out the supported 3D mesh file types.
Here we select a 3D mesh file that we want to slice from the computer.
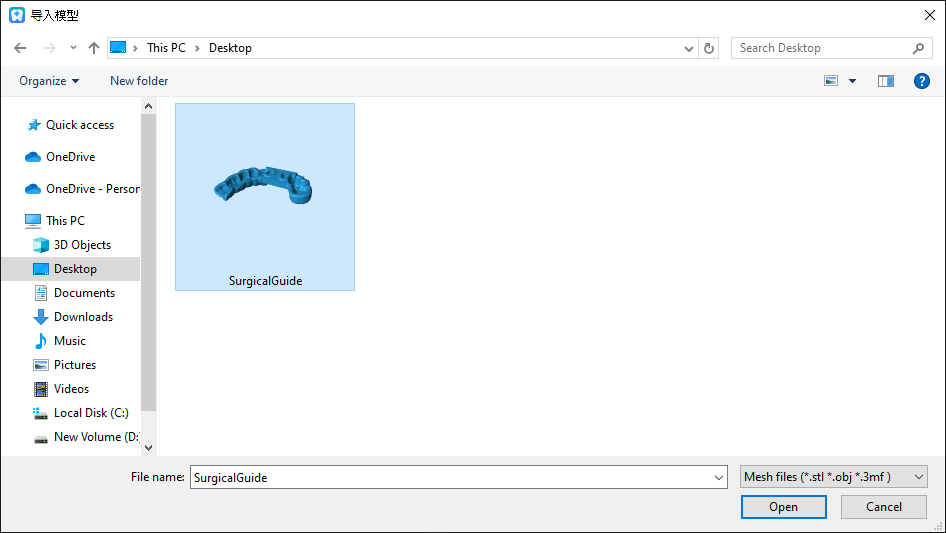
Click "Open".
Auto Processing
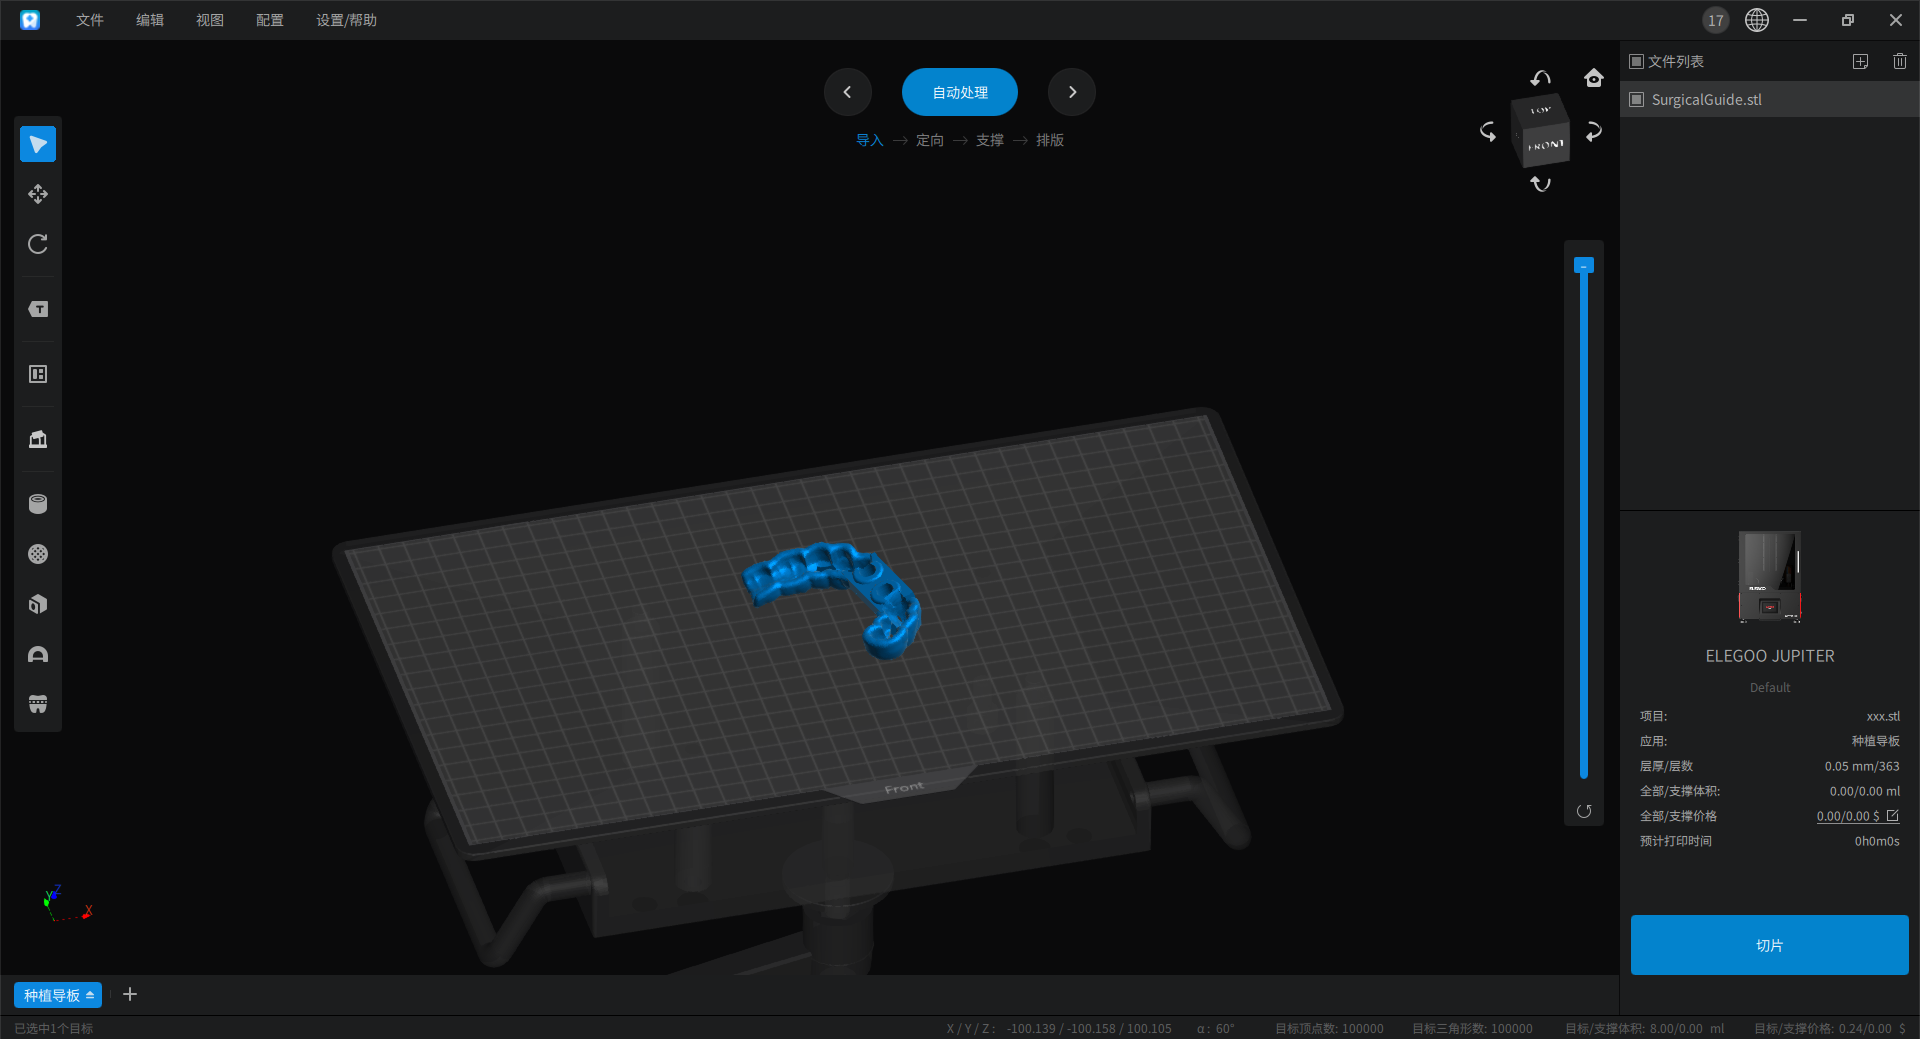
If your application supports automatic processing, you will see an "Auto Processing" button at the top of the main window. Click this button to automatically orient, repair, hollow, and support the model.
You can configure the automatic processing flow in detail according to your usage habits. For simplicity, we will use the default settings and click "Auto Processing".
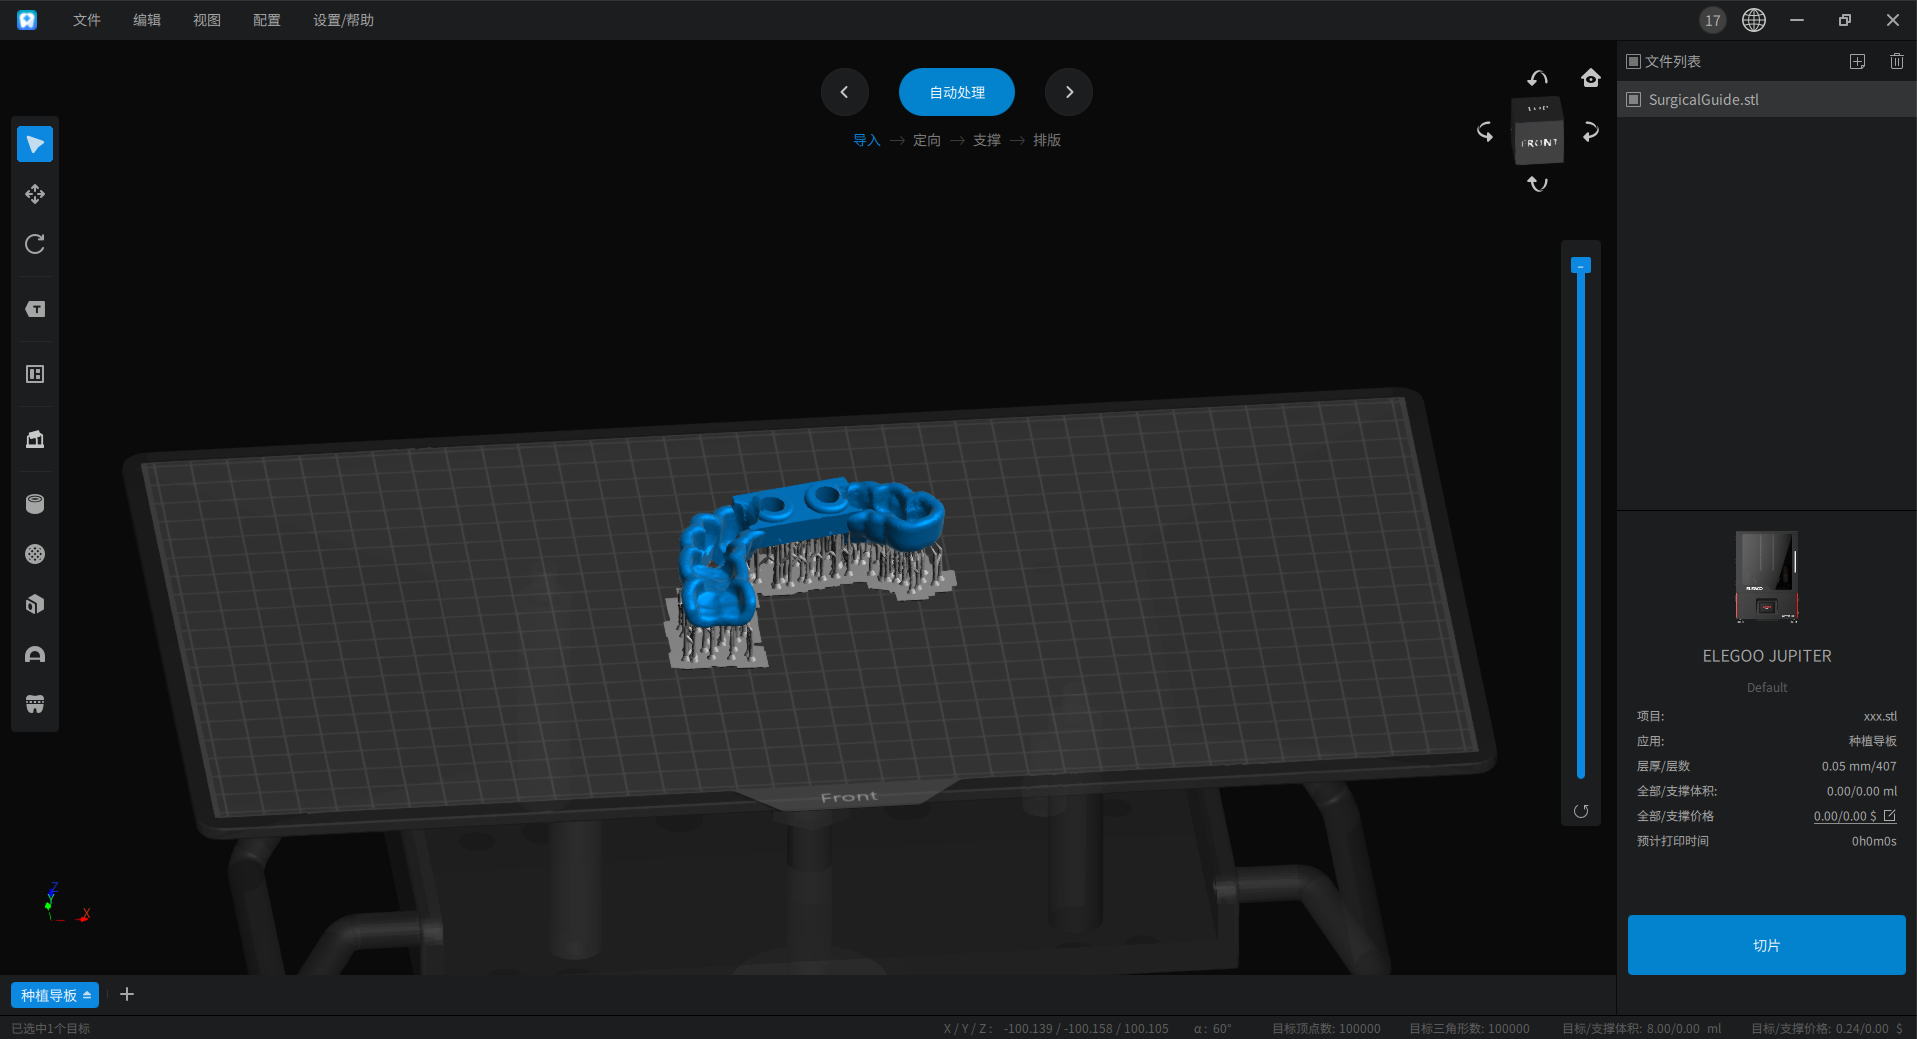
If the application you selected does not support the automatic processing flow, click the support icon on the left side of the main window to open the support configuration interface. Again, for simplicity, use the automatic support function, click the "Automatic Support" button.
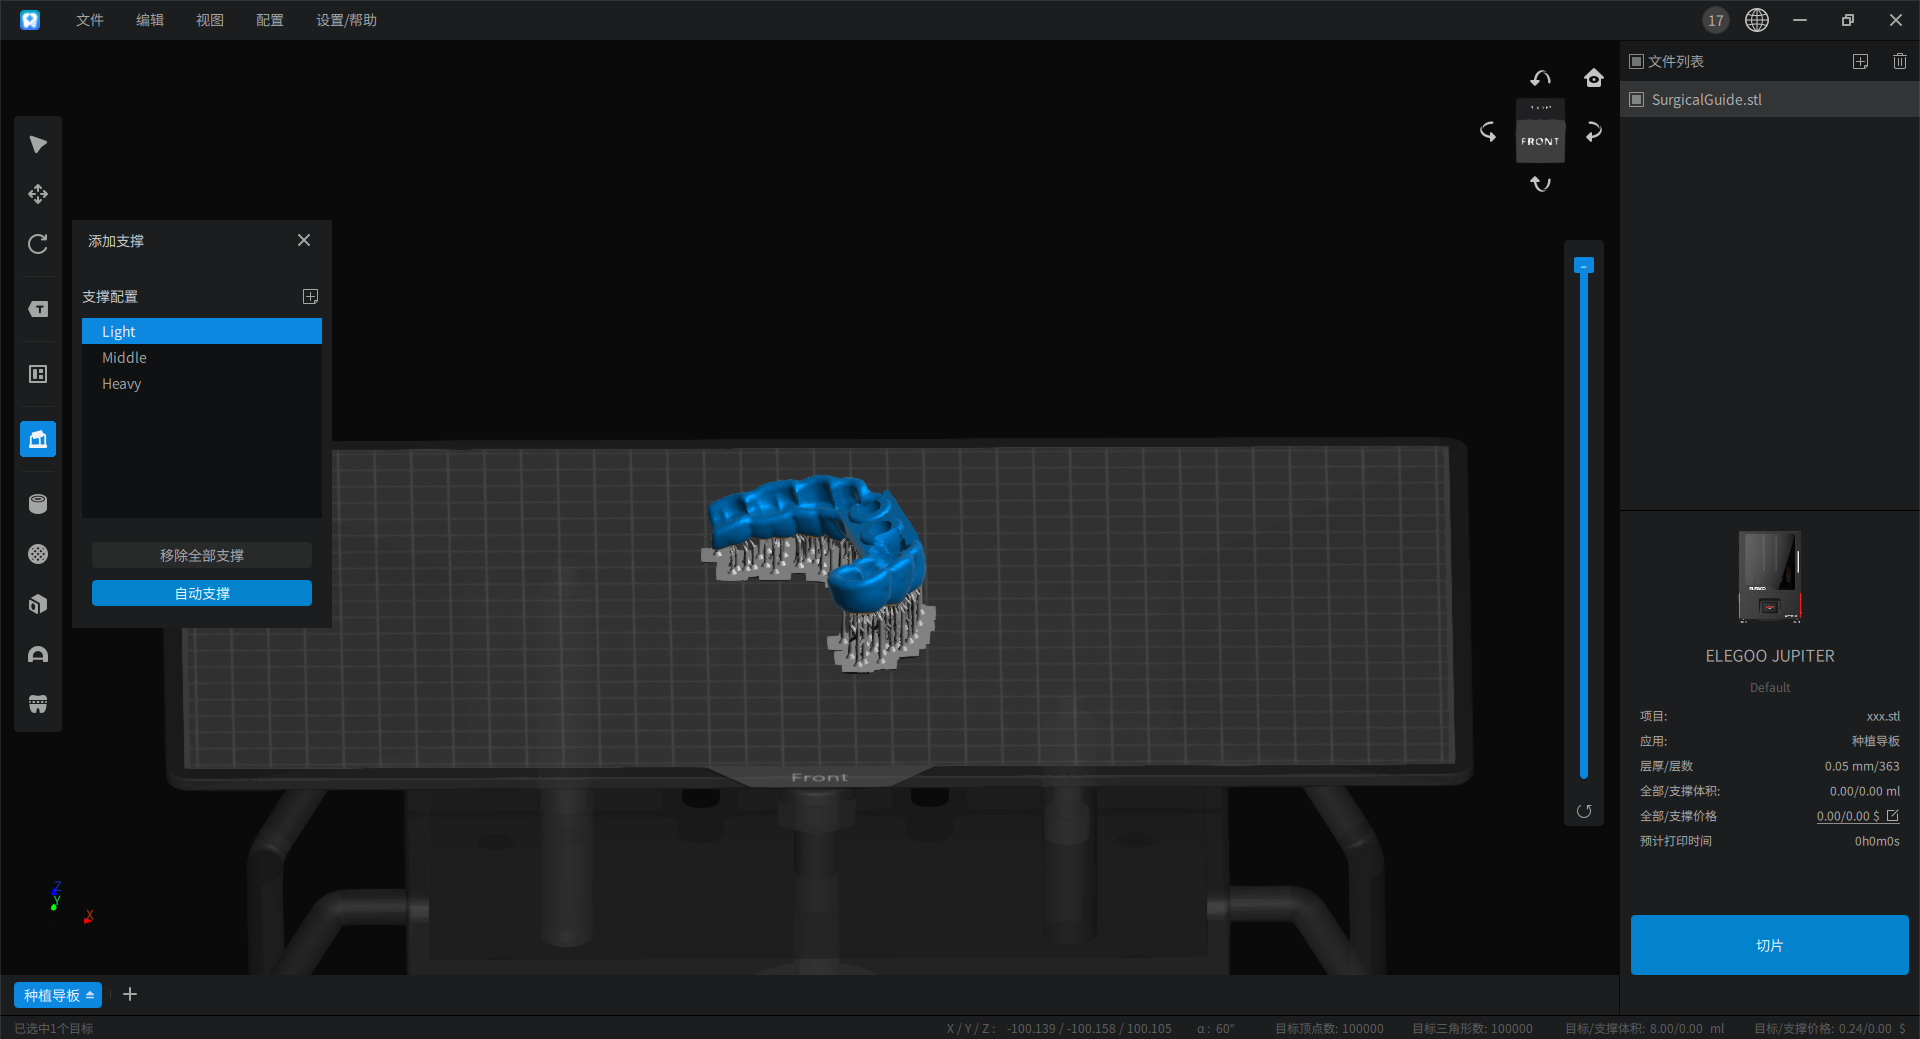
Not bad, now we're can go ahead to slice the file.
Slice Files
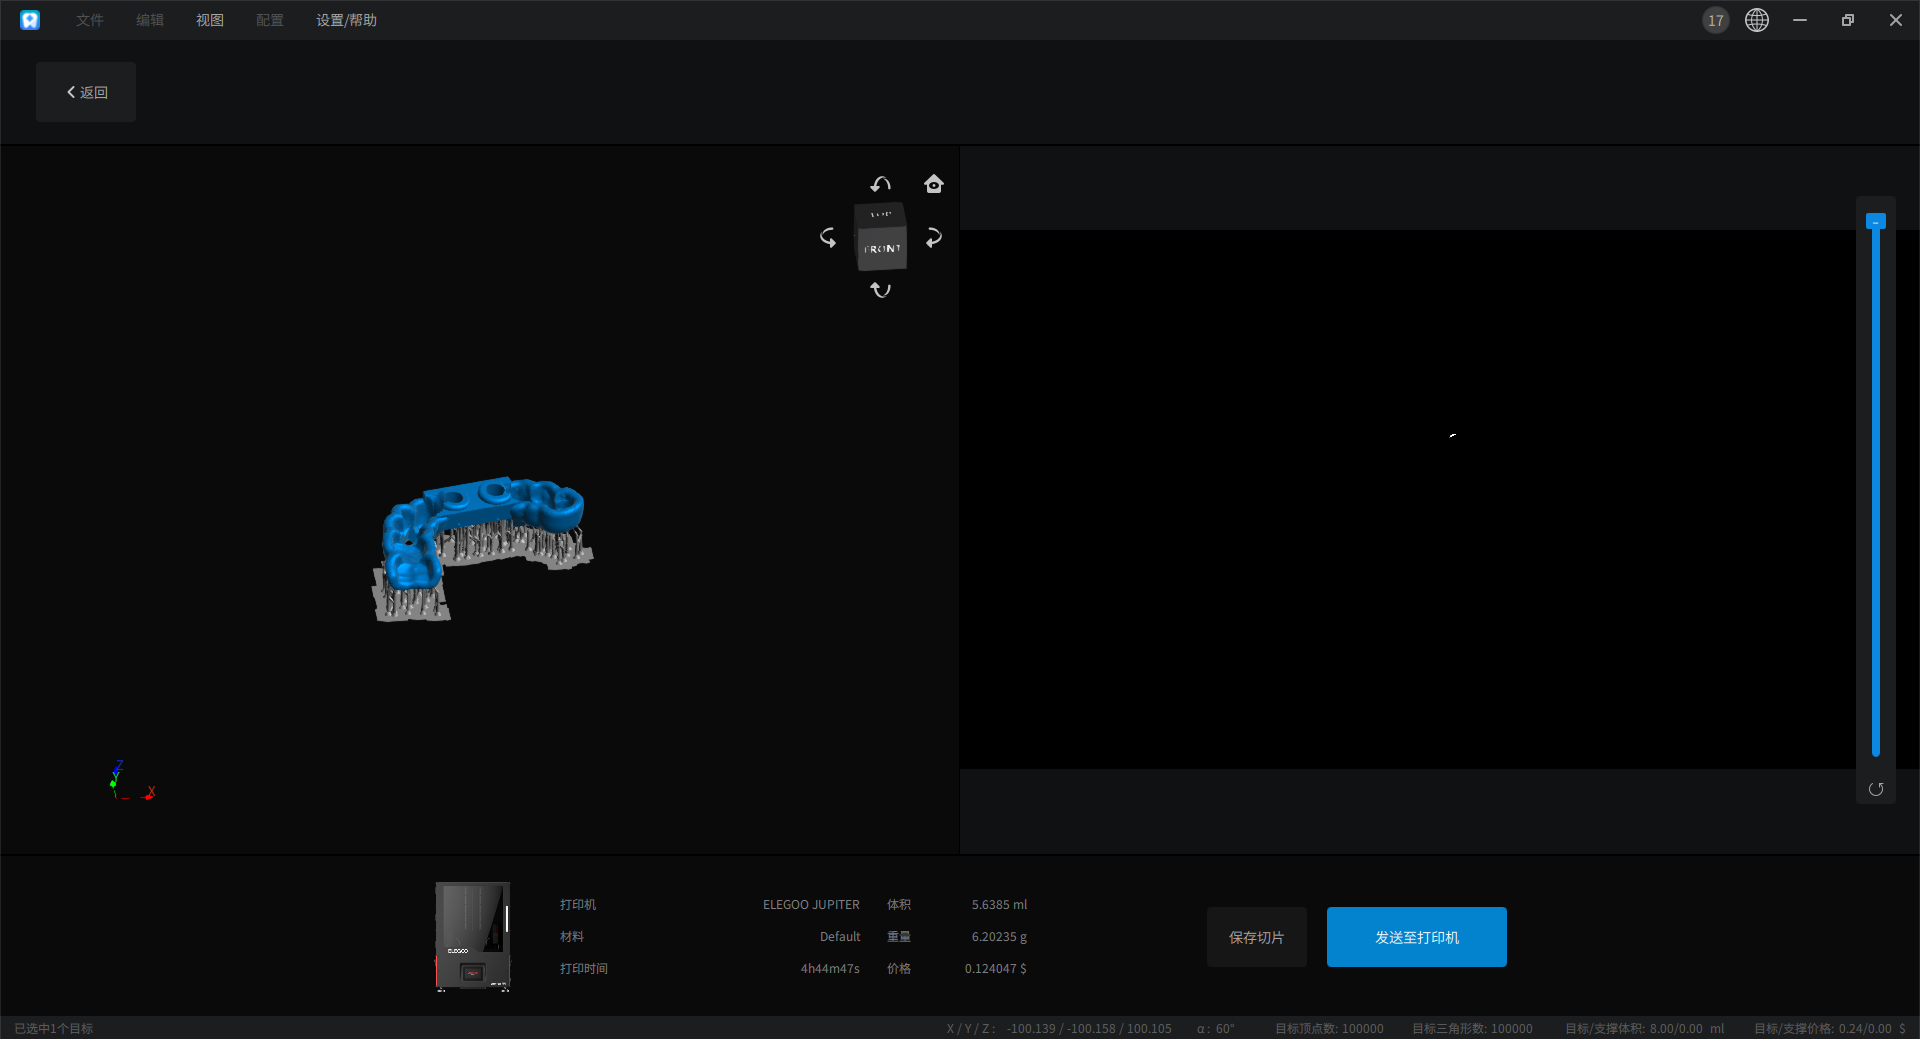
Then click the "Slice" button on the lower right to slice the file to slice the file. This process will take a while, depending on the size of the model and the complexity of the supports. It converts the 3D mesh file into a printable file that can be read by the printer.
Export the Printable File
This is the final step, click the "Save" button on the lower right to open up the save dialog window.
Please do not save the sliced file directly to the USB drive, this can be error-prone. The recommended workflow is to save the file to your computer hard drive first, and then copy the file to the USB drive. Also, if you're planning to print something big, it is highly recommended to load the sliced file back to chitubox and preview the file see if any error can be found visually so you don't waste your time and resin print a corrupted file.
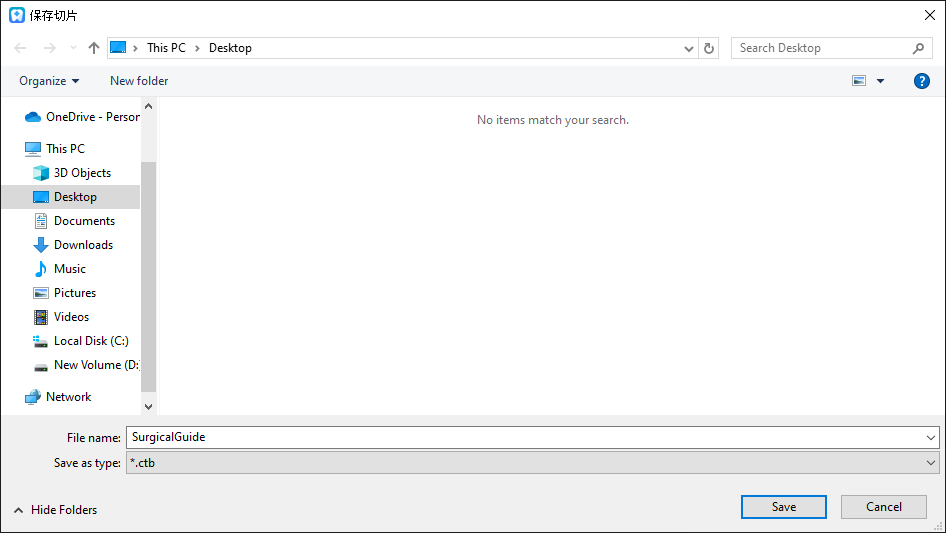
Here you can name the file and choose the location to save the file. Make sure to select the .ctb format in the "Save as type" dropdown menu.
Copy the file to your USB drive, you're good to go! 🎉🎉🎉